
Customer subscription mandate registration
Introduction
The subscriptions feature, introduced in 1.20.x.x provides a membership type service. It allows membership plans to be created, which clients can subsequently subscribe to.
This guide details what mandates are and how a client can sign a mandate.
Mandate overview
A mandate is a contract that a customer signs to authorise and grant future charges to their credit card. Associated to a subscription plan, a mandate defines details such price, the frequency of payment and the minimum contract duration.
Process overview
To create a subscription plan that a customer can subscribe to the following steps are necessary:
Define a subscription plan and publish a plan - see Setting up and managing subscription plans for further information.
Customer signs a mandate for a plan - a mandate will then be automatically generated
To allow customers to sign-up to a new mandate, reservie supports two interfaces:
Legacy interface - this is the original interface that acts as a standalone component of reservie.
V4 Schedule - subscriptions can be integrated and joined via the v4 schedule.
Legacy interface - Customer sign-up process
When a customer registers to a subscription plan, they do so be signing a mandate. This mandate has 3 parts:
1) Overview of the mandate and sign in
2) Confirm terms and assign payment
3) Complete
Once complete, the mandate will enter its life cycle . Invoices will be generated 48 hours before their due date/time. Once the due date/time has been reached the associated credit or debit card will be charged.In the event that the credit card cannot be charged, the customer will be notified and asked to resolve the issue.
Step 1: Overview of the mandate and signin
To enable a customer to complete the signing of a mandate, they must first authenticate themselves. For existing clients, this is simply a matter of providing their username and password. Of if they are new to the system, they will need to first complete registration.

Step 2: Confirm terms and provide payment
Upon clicking the ‘sign in to get started’, the system will verify the customer and if successful, display the following screen:
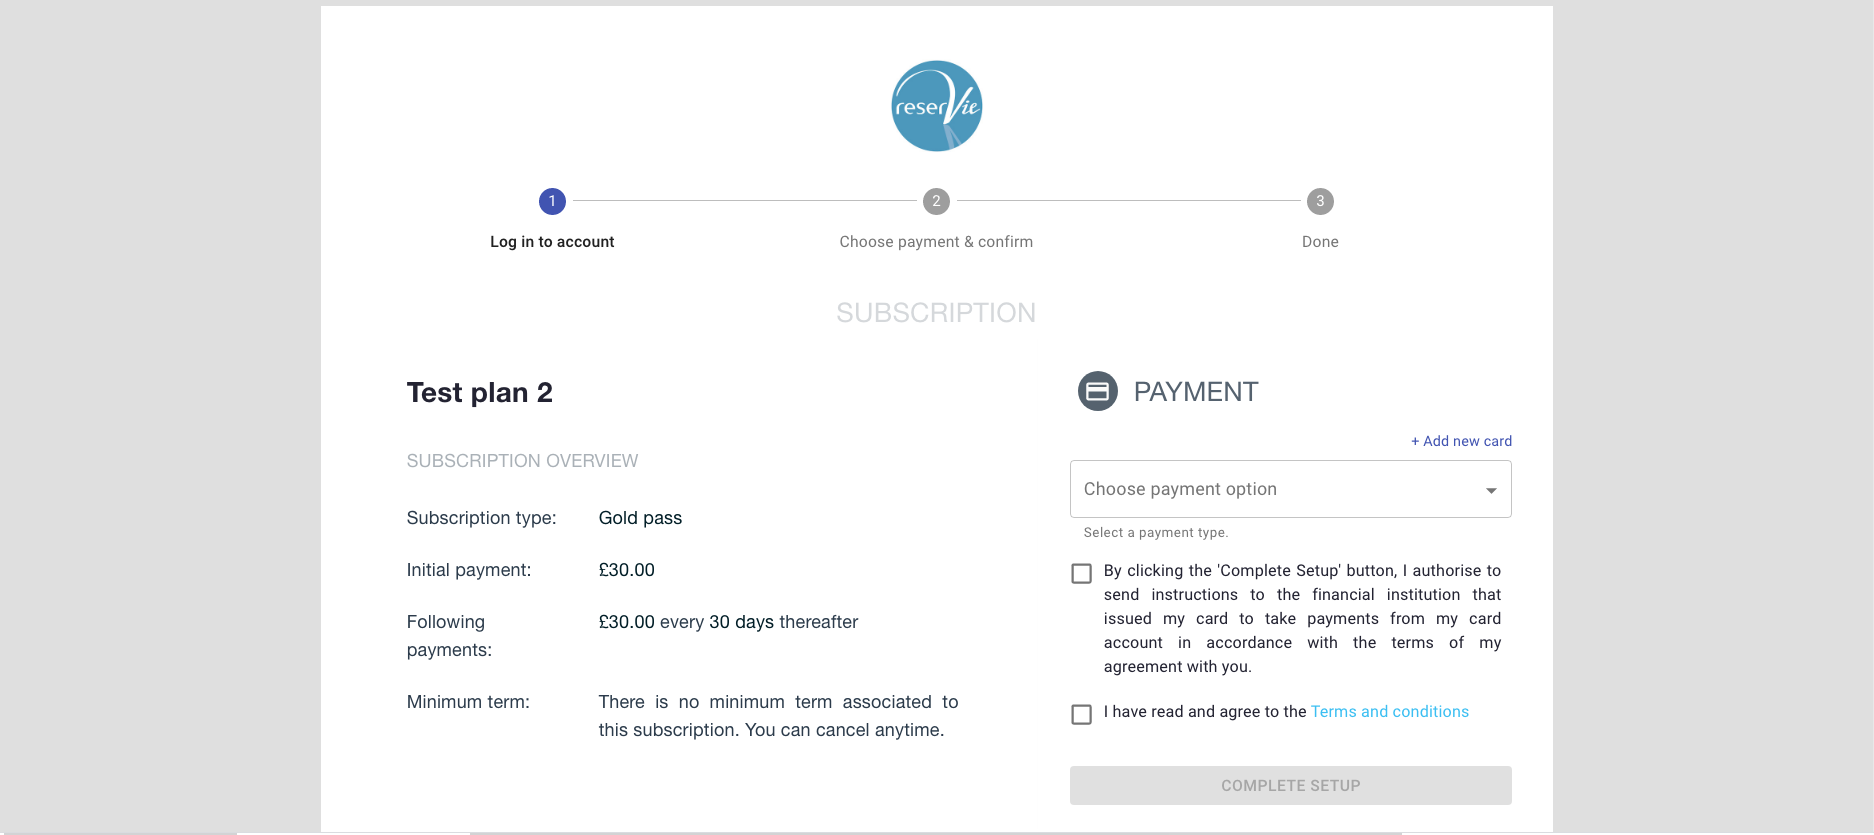
The overview of the mandate sign-up confirms:
Name of plan - this is the name of the plan.
Subscription type - this is the association of mandate to a specific reserVie service type. In 1.20.x.x the service type, will be a Pass.
Minimum term - If a minimum contract term has been defined, details will provided. Minimum contract terms, define the minimum period that a subscription mandate must be active before it can be cancelled.
Within this section, the customer must choose a payment type. Customer may choose from an existing / saved credit card or add an additional card.
Using an existing credit or debit card


Adding a new credit or debit card
To add a new credit or debit card, the customer should click the ‘Add new card’ link.

Note: When adding a credit card, the details are cross verified with the customer’s bank. As part of this process, they may be asked with the issuing bank to provide validation and verification. This process varies from bank to bank - however, the customer will be provided with addition instruction as necessary.
Once the payment has been added and associated to the mandate, the finally the terms needs to be agreed to. The ‘Confirm setup’ button will then become active.
To complete the setup, the customer must finally click the ‘complete setup’
Step 3: Click the ‘Confirm setup button
The system will make final checks. If validation is successful, the following screen will be presented:

The subscription mandate is now active and will enter the mandate life cycle
V4 Schedule - customer signup process
When a customer registers to a subscription plan, they do so be signing a mandate. This mandate has 3 parts:
1) Overview of the mandate and sign in
2) Confirm terms and assign payment
3) Complete
Once complete, the mandate will enter its life cycle . Invoices will be generated 48 hours before their due date/time. Once the due date/time has been reached the associated credit or debit card will be charged.In the event that the credit card cannot be charged, the customer will be notified and asked to resolve the issue.
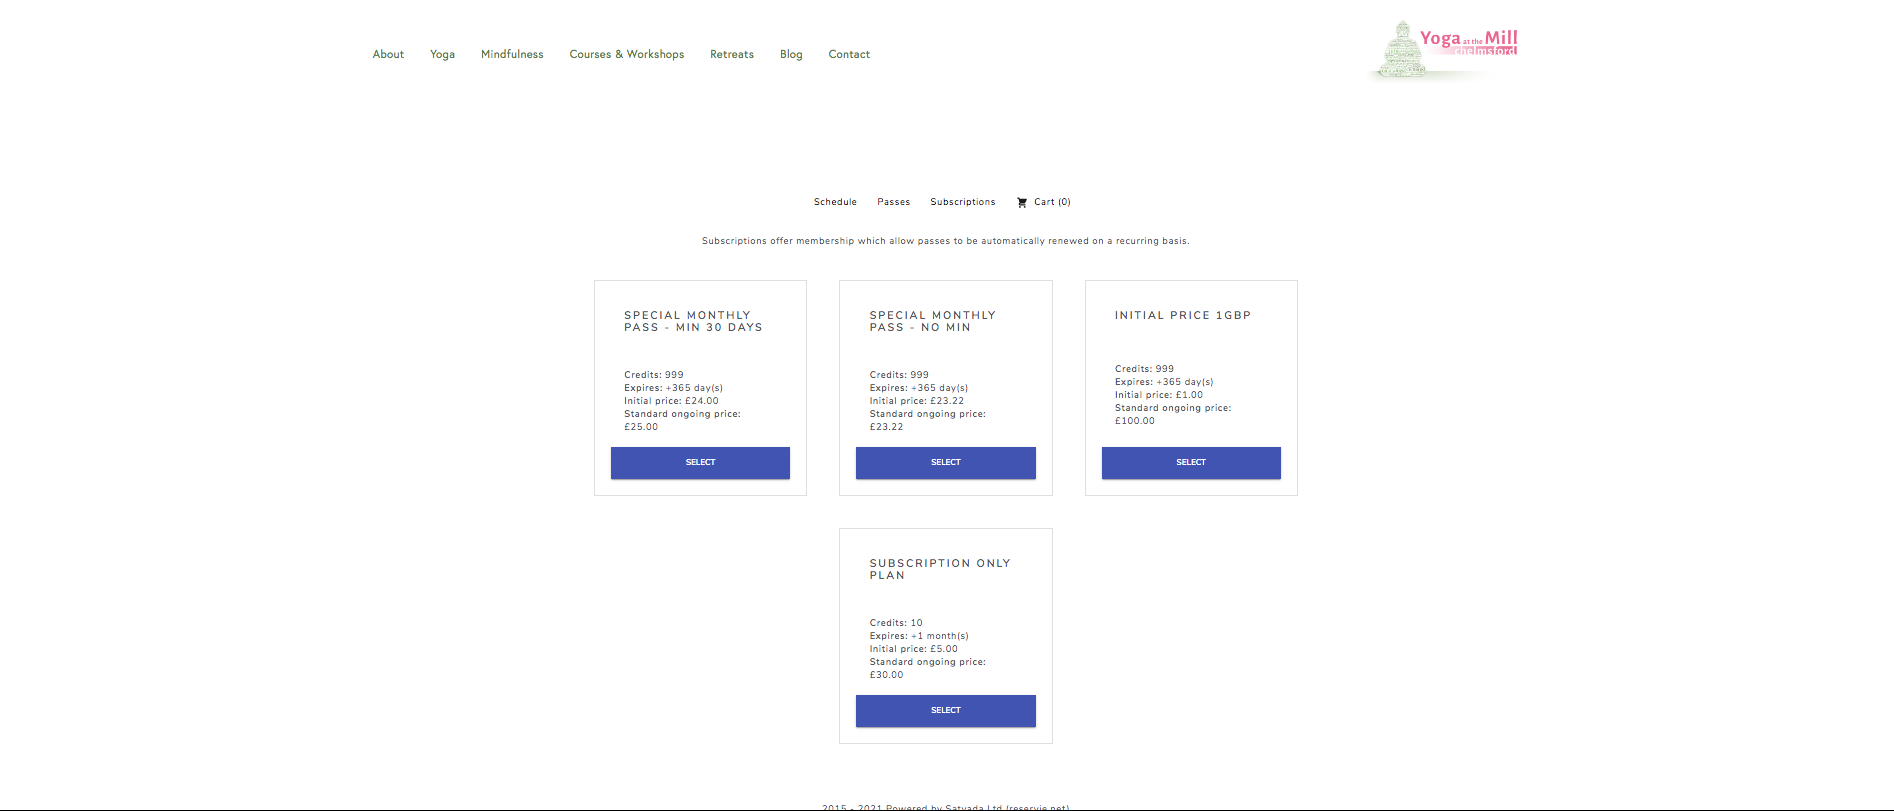
Step 1: Navigate to the schedule and click select the subscriptions tab
To enable a client to select a subscription, they must first navigate to your schedule. This is normally embedded on a page in your website and upon selection, they will see all available subscription options, as can be seen in the following example:
Step 2: Select a subscription
Upon the customer selecting a subscription, this will be added to their cart. They will then be asked if they would like to continue shopping or to complete checkout.
Note: if the client is not signed in at this stage, they will be prompted to do so.
Tip: To ensure that that the customer uses their new pass for any subsequent bookings, we recommend that they proceed to cart - this enables the mandate to be setup and ready for you.

Step 3: Proceed to checkout and confirm subscription
Upon proceeding to the cart, the client will be invited to confirm their subscription choice and if happy to click the ‘checkout’ button.

Step 4: Complete the payment and await for the subscription to be setup
Upon completing the payment, the system will proceed to setup the subscription.
